photoshop鼠绘逼真黑白的橡皮面具
(编辑:jimmy 日期: 2026/7/11 浏览:2)
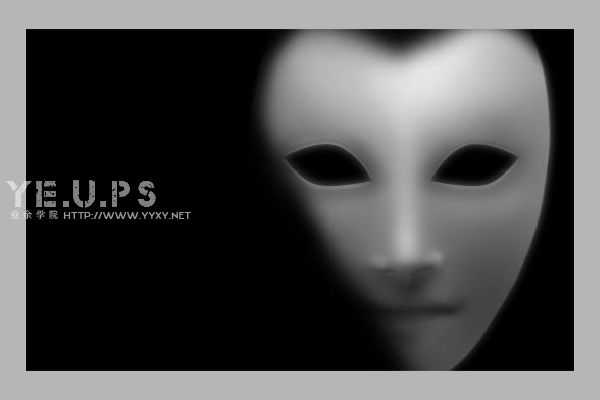
最终效果
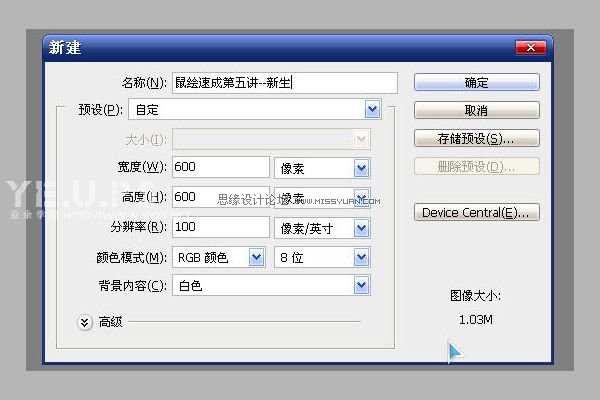
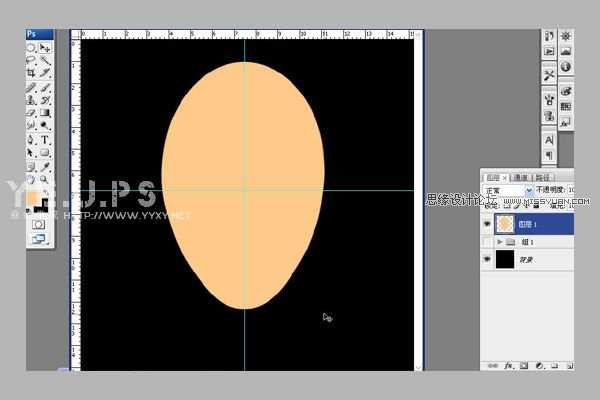
1、新建画布,具体设置如下图。
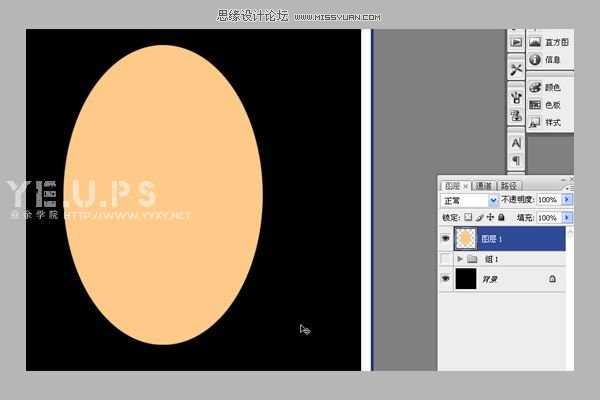
2、新建图层,选择个皮肤色,建立选区,填充颜色:#FFC989。
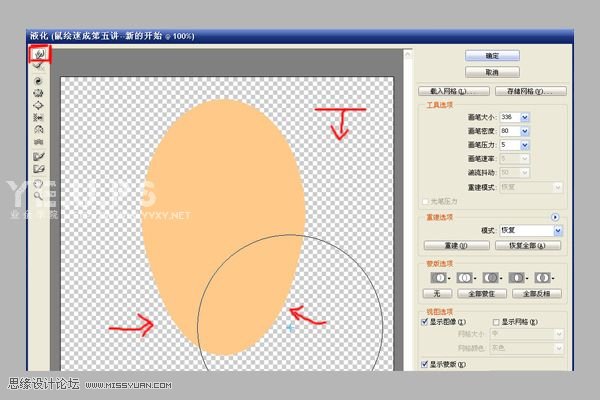
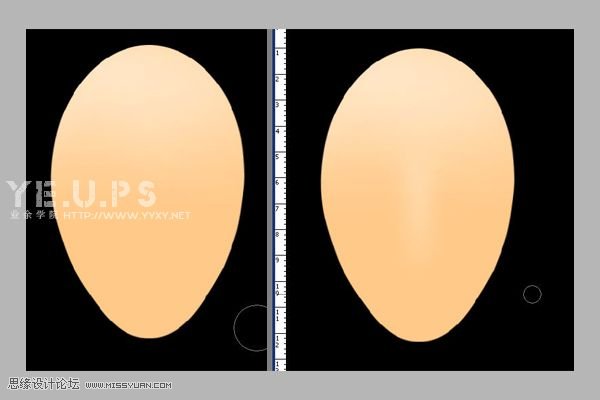
3、使用液化工具对我们的事业加以改造~修改成脸的形状。然后拖出参考线看看是否对称。(这一步很重要,可以捉个人来对照下,鞋拔子脸不行,切记)
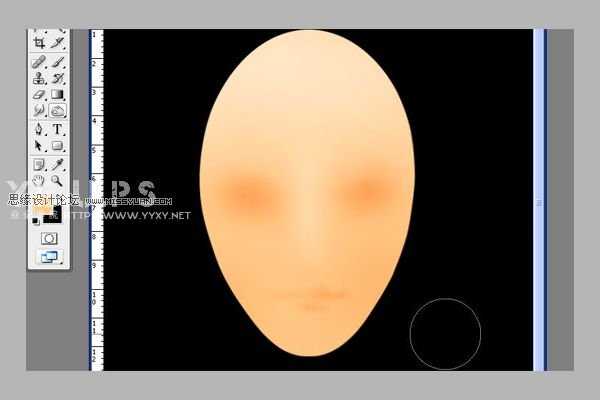
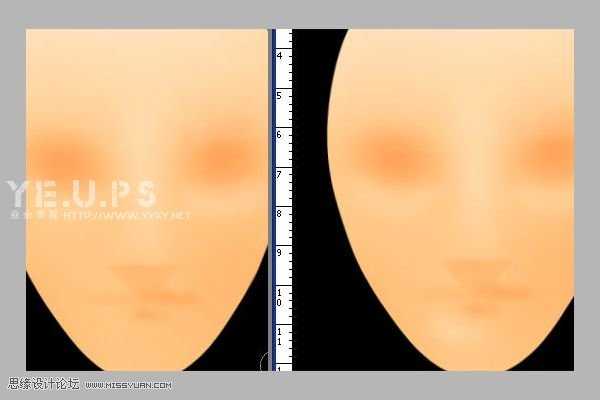
4、选择减淡工具,范围:中间调,曝光率:10%,大笔刷减淡额头高光,小笔刷减淡鼻子高光。具体多大,自己调调看。
5、加深工具,范围:中间调,曝光率:10%,擦出眼框与嘴唇部分的阴影。眼睛长哪就不用我说了吧。自己估摸着。
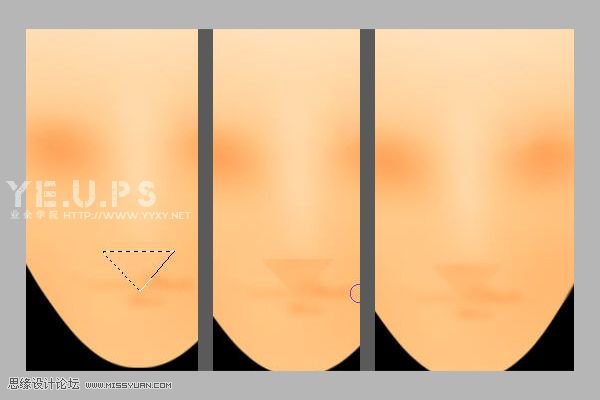
6、倒三角选区,加深工具+模糊工具,做出鼻子下面的阴影区域。
7、减淡工具,颧骨高光~下巴高光。
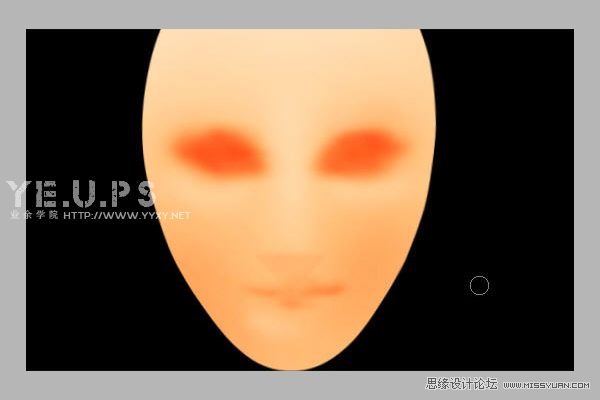
8、加深工具继续加深眼框,眼红为止。
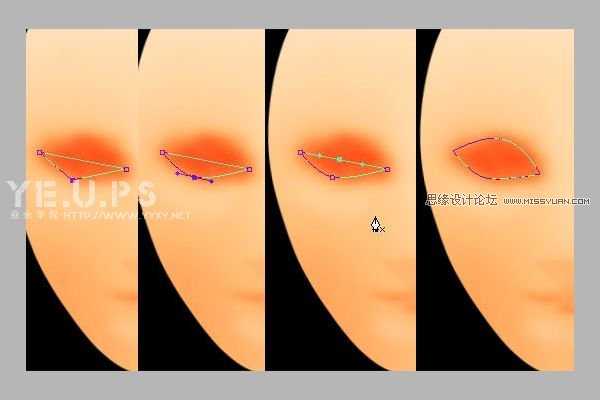
9、钢笔工具画出眼框路径(这好像是第一次课程当中用到钢笔工具哦,这玩意忒强大了,以后少不了)
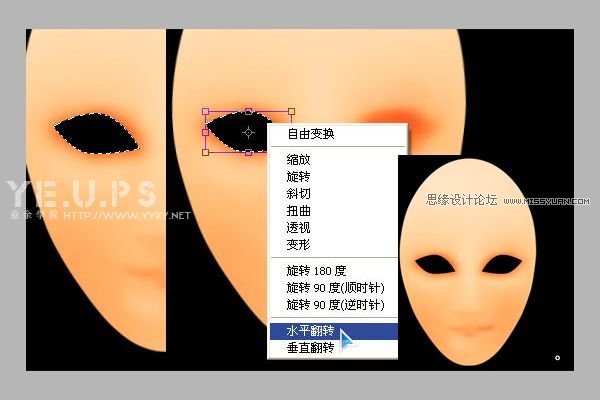
10、路径转化为选区,删除眼眶。水平翻转选区,移动到另一边删除眼眶。不能搞个独眼龙你说是吧。
上一页12 下一页 阅读全文
1、新建画布,具体设置如下图。
2、新建图层,选择个皮肤色,建立选区,填充颜色:#FFC989。
3、使用液化工具对我们的事业加以改造~修改成脸的形状。然后拖出参考线看看是否对称。(这一步很重要,可以捉个人来对照下,鞋拔子脸不行,切记)
4、选择减淡工具,范围:中间调,曝光率:10%,大笔刷减淡额头高光,小笔刷减淡鼻子高光。具体多大,自己调调看。
5、加深工具,范围:中间调,曝光率:10%,擦出眼框与嘴唇部分的阴影。眼睛长哪就不用我说了吧。自己估摸着。
6、倒三角选区,加深工具+模糊工具,做出鼻子下面的阴影区域。
7、减淡工具,颧骨高光~下巴高光。
8、加深工具继续加深眼框,眼红为止。
9、钢笔工具画出眼框路径(这好像是第一次课程当中用到钢笔工具哦,这玩意忒强大了,以后少不了)
10、路径转化为选区,删除眼眶。水平翻转选区,移动到另一边删除眼眶。不能搞个独眼龙你说是吧。
上一页12 下一页 阅读全文
上一篇:汉王插画教程系列 永远的马拉多纳