photoshop鼠绘忧郁的古典美女头像
(编辑:jimmy 日期: 2026/7/11 浏览:2)
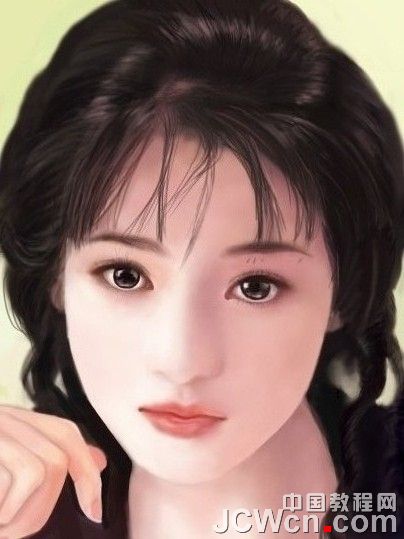
最终效果

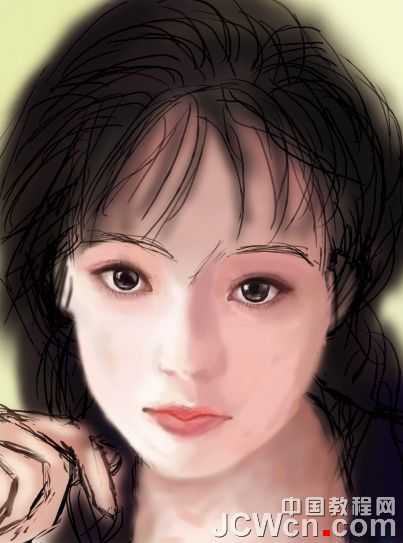
1、选用ps或pt自带的画笔,边缘硬一些,用来勾边。也可以直接图色块或黑白上色,这些方法在以后的教程中单独讲。

2、直接画出个大型 不要用钢笔去拉线 只是用来确定方位。
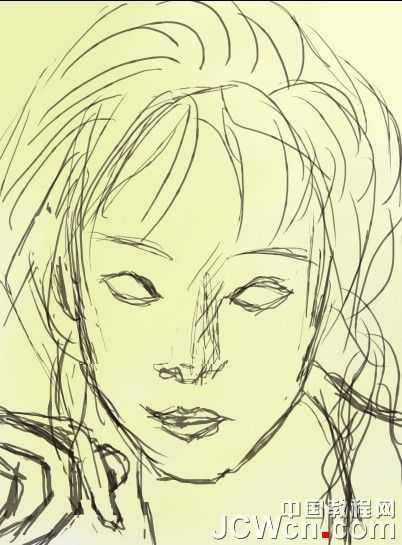
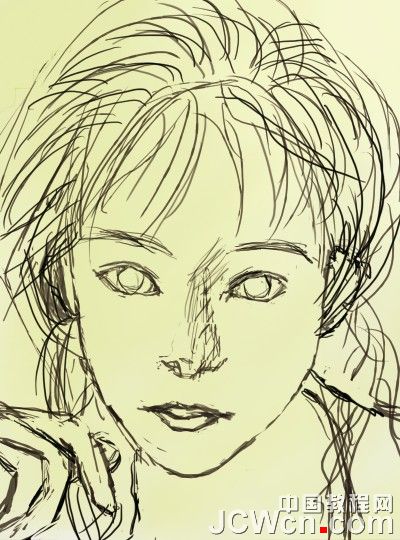
3、然后修型,修的准确细节一点,用来做线稿,可以适当降低透明度。
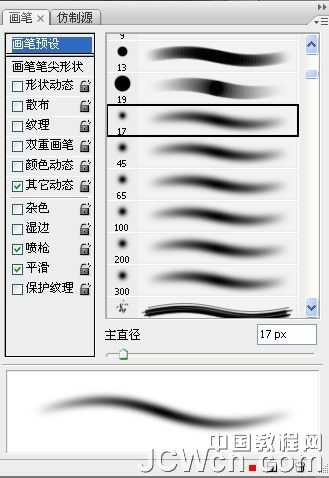
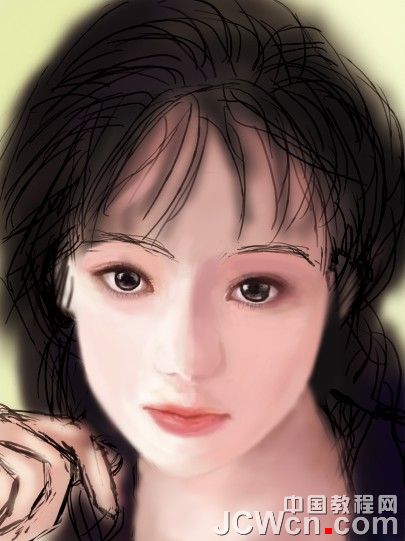
4、然后开始上色,我用的是直接上色,最好单独建一层-正片叠底-上色。不要覆盖在线稿上,选用边缘较柔和的画笔来画大色块,这样就不用去考虑过渡了。
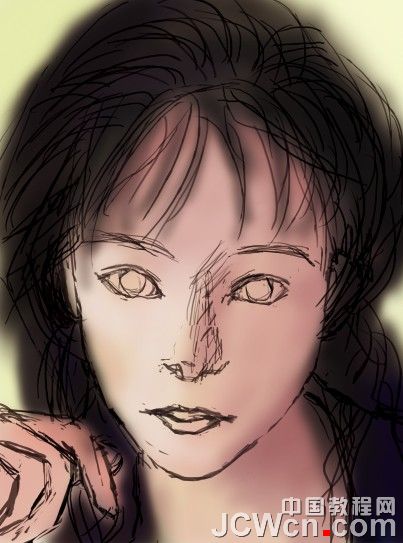
5、继续把脸上应该有的东西加上,加的时候也要注意光照射的方向。

6、不要忙着去涂抹脸部的皮肤,先上色修型。

7、润下脸型,画上眼睛。不必一来就画成最终效果,只是眼睛有神,感觉更像人,不是在玩泥巴。
8、加上手,注意光线,没有别的。
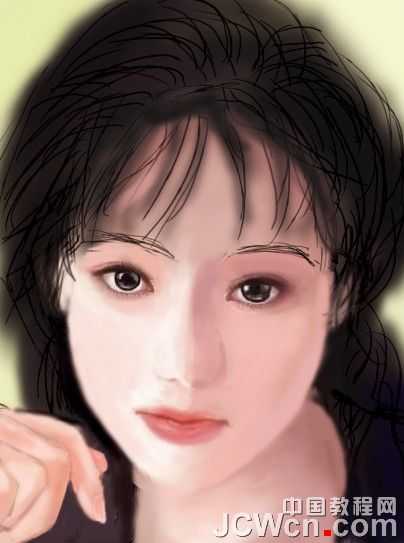
9、脸画的差不多的时候,就开始画头发,衣服。换言之,整张图同步进行。头发可以分一个图层,画脸就不要分图层了。因为会很麻烦。

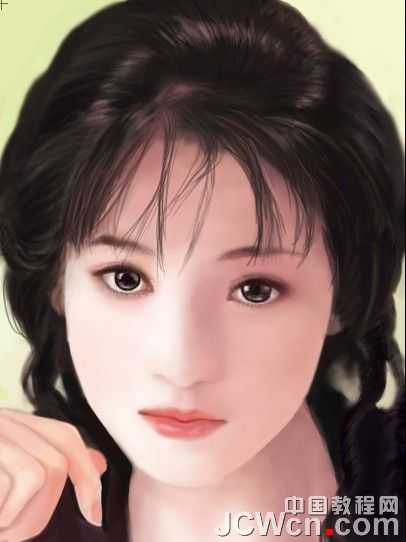
10、在整个过程中,脸就自己变滑了,就是慢慢润的。用柔和的画笔过渡。完成最终效果:
1、选用ps或pt自带的画笔,边缘硬一些,用来勾边。也可以直接图色块或黑白上色,这些方法在以后的教程中单独讲。
2、直接画出个大型 不要用钢笔去拉线 只是用来确定方位。
3、然后修型,修的准确细节一点,用来做线稿,可以适当降低透明度。
4、然后开始上色,我用的是直接上色,最好单独建一层-正片叠底-上色。不要覆盖在线稿上,选用边缘较柔和的画笔来画大色块,这样就不用去考虑过渡了。
5、继续把脸上应该有的东西加上,加的时候也要注意光照射的方向。
6、不要忙着去涂抹脸部的皮肤,先上色修型。
7、润下脸型,画上眼睛。不必一来就画成最终效果,只是眼睛有神,感觉更像人,不是在玩泥巴。
8、加上手,注意光线,没有别的。
9、脸画的差不多的时候,就开始画头发,衣服。换言之,整张图同步进行。头发可以分一个图层,画脸就不要分图层了。因为会很麻烦。
10、在整个过程中,脸就自己变滑了,就是慢慢润的。用柔和的画笔过渡。完成最终效果: