Photoshop绘制出逼真精美的彩绘国画陶瓷
(编辑:jimmy 日期: 2026/7/11 浏览:2)
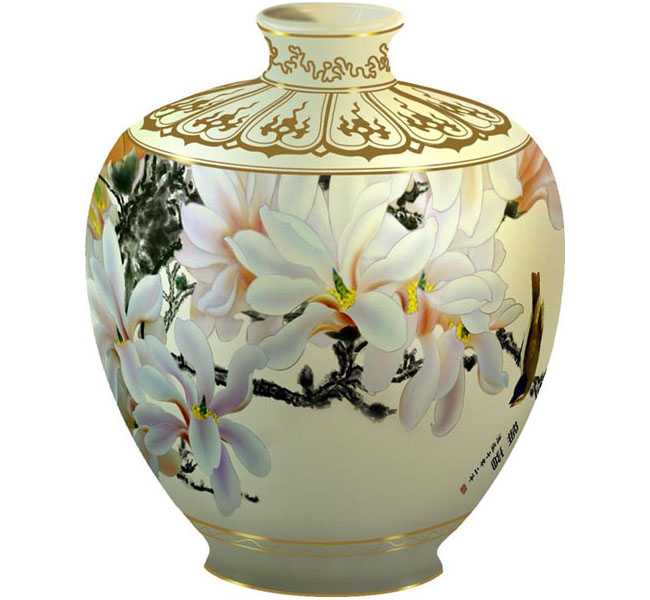
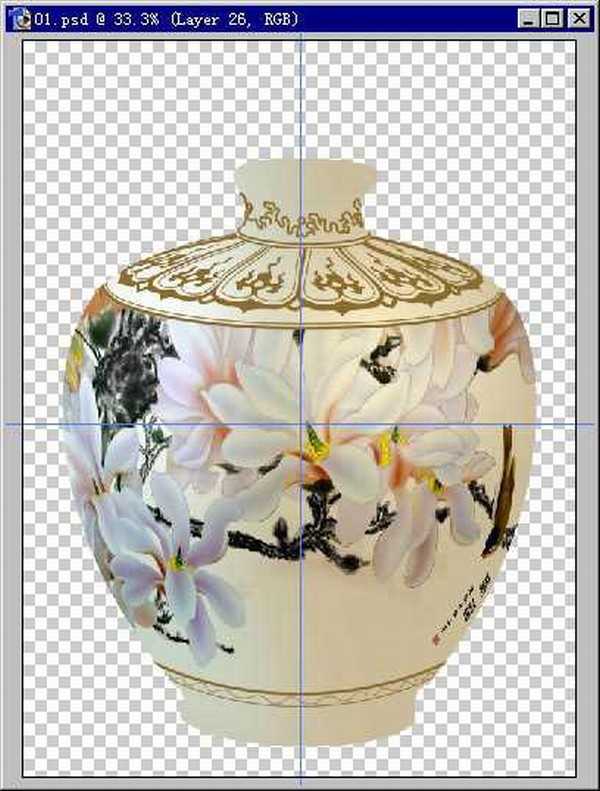
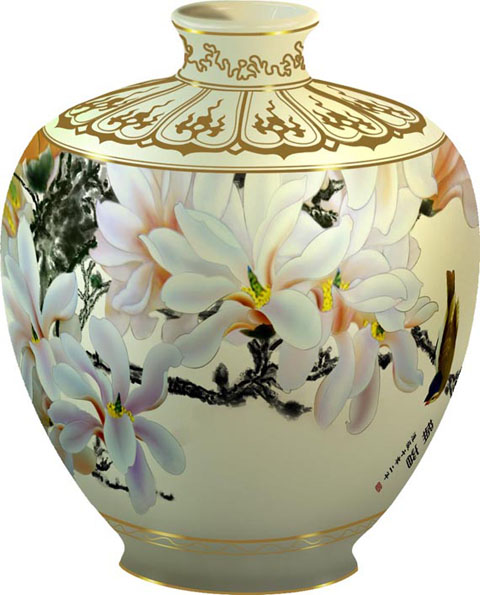
最终效果


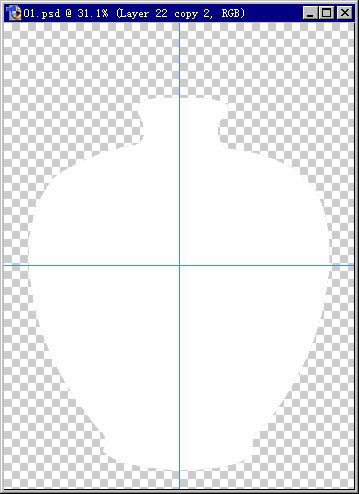
1、首先绘出一个陶瓷花瓶的外形,如下图。
2、我画的是一个比较典型的花瓶外形,设想光源有二,左边是主光源,右边有一暖色辅助光。设置好渐变色,如图,先上辅光这面的颜色。
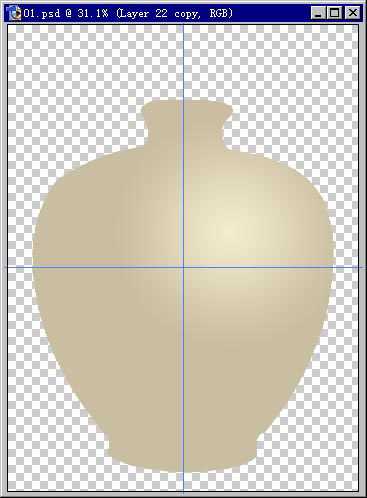
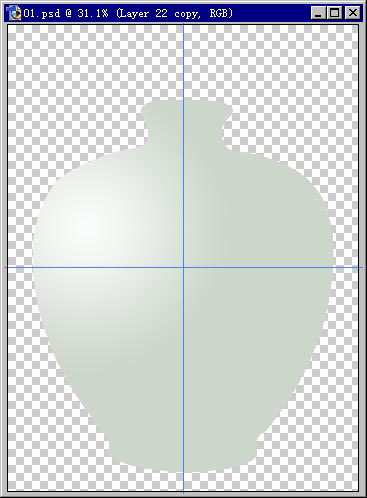
3、这是主光源这边,设想成自然光,花瓶呈现的差不多是本色。
4、用钢笔工具画出明暗交界线。你可以画得很细,这样以后的修改就会少些。
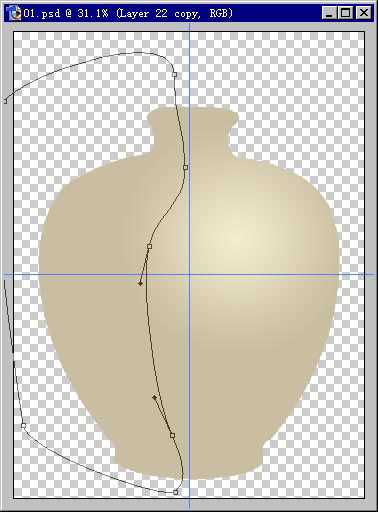
5、将路径转化为选区,羽化稍大(我的是80),反选后应用到蒙板。(此时我的暖色一边在上层。)大体的明暗、中间调便出来了。
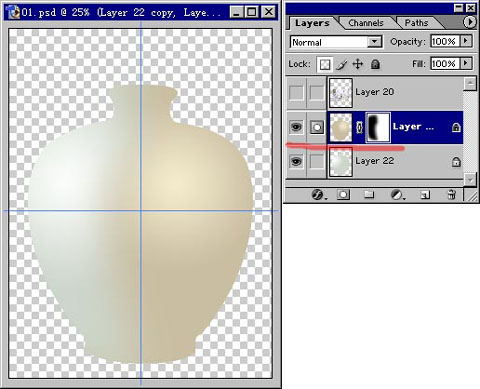
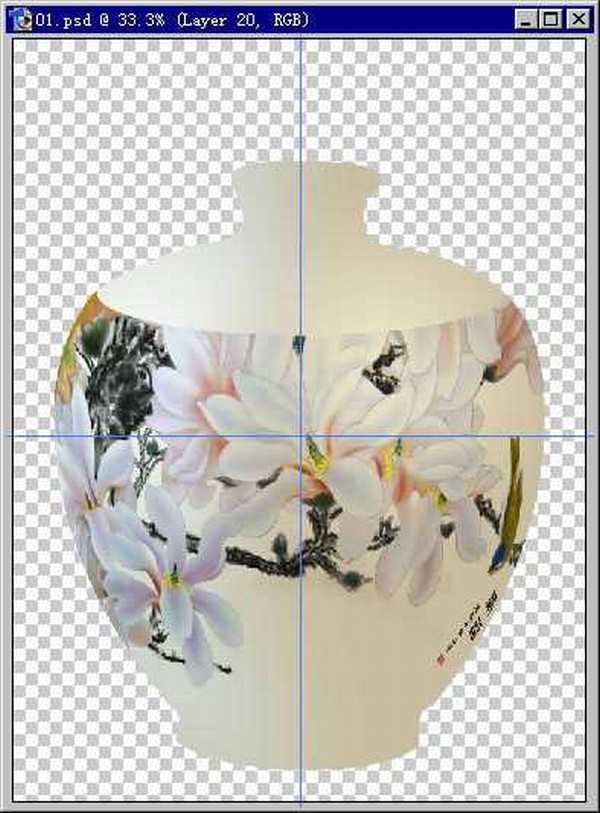
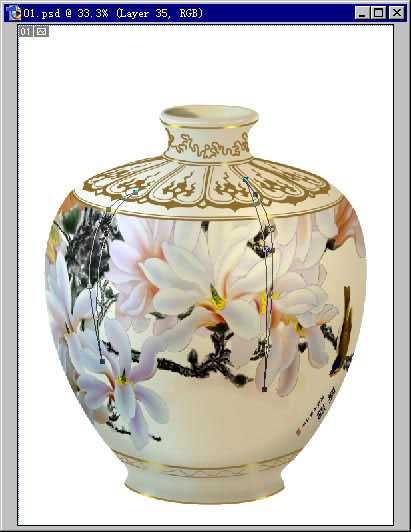
6、选一幅合适的国画,经过扭曲变形后叠在上层,应用花瓶外形选区作蒙板。
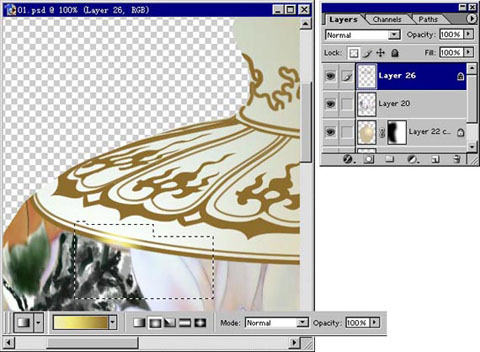
7、添加一些装饰(可以用失量软件绘制),注意与瓶体之间的关系。
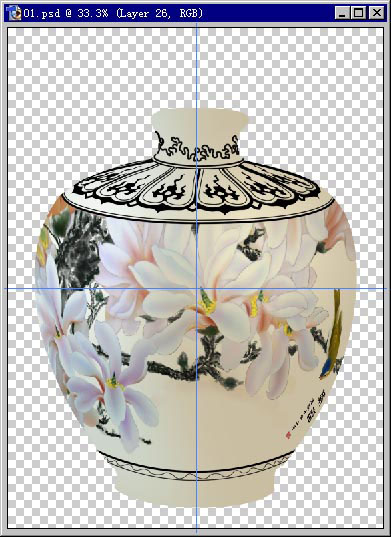
8、给装饰线上色。我准备做成镀金线,因为其质感可与瓷作对比。
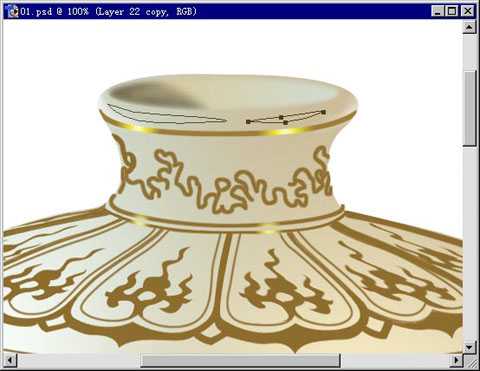
9、用渐变绘出金属装饰线的高光,设置如图。注意高光点的位置和大小。
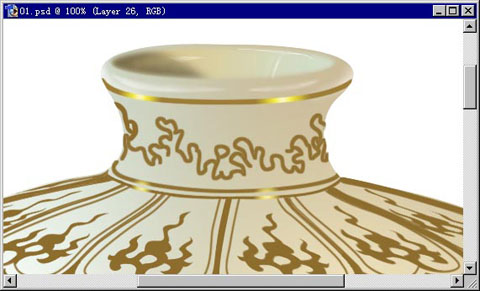
10、用渐变处理瓶口。
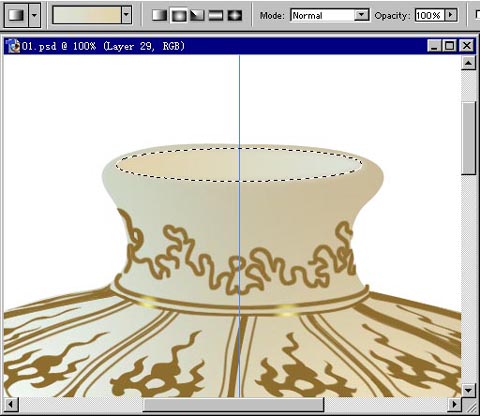
11、准备添加高光。
12、准备刻画瓶底。
13、在其上新建一层,因为瓶底较上部暗,使用黑色填充。
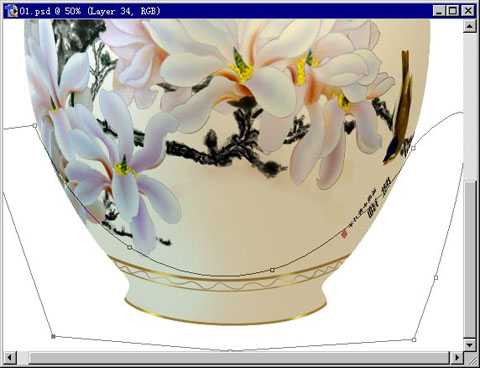
14、调整其透明度到合适数值,然后如瓶口般精细刻画。完成后,考虑在瓶体回两条高光,注意位置和形状。
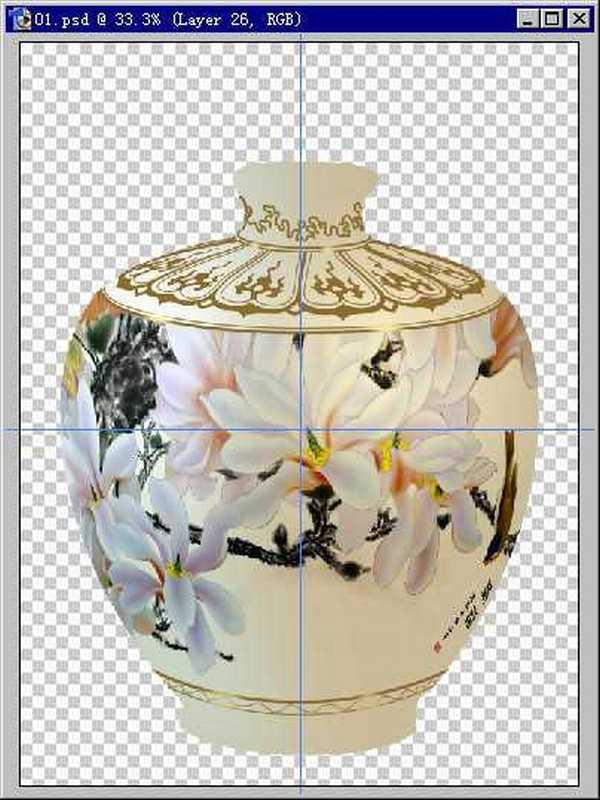
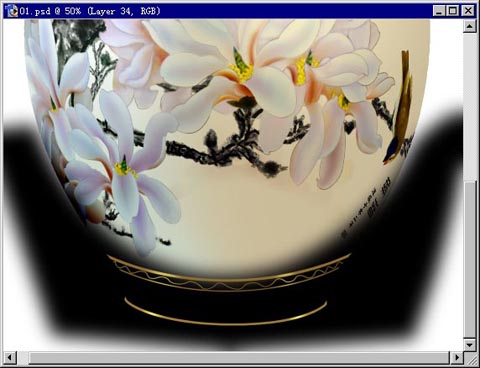
15、最后全面调整,明暗交界线如果不理想,可在蒙板上方便修改;总之要耐心、细致地观察,不对劲的地方适当调整。下面是完成后的效果。
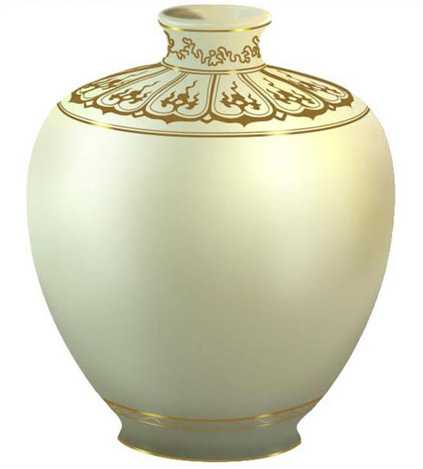
这是没有帖图时的效果:
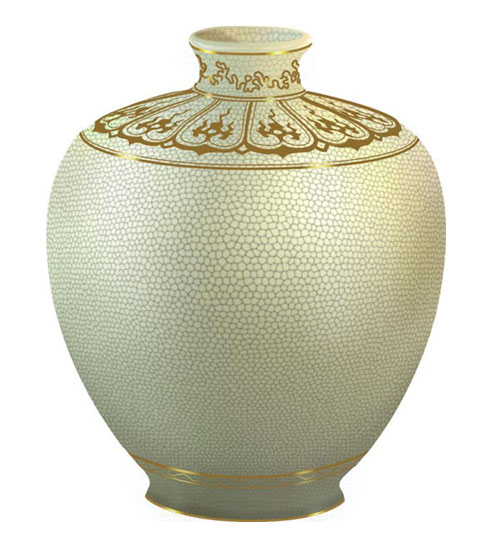
仿古:
1、首先绘出一个陶瓷花瓶的外形,如下图。
2、我画的是一个比较典型的花瓶外形,设想光源有二,左边是主光源,右边有一暖色辅助光。设置好渐变色,如图,先上辅光这面的颜色。
3、这是主光源这边,设想成自然光,花瓶呈现的差不多是本色。
4、用钢笔工具画出明暗交界线。你可以画得很细,这样以后的修改就会少些。
5、将路径转化为选区,羽化稍大(我的是80),反选后应用到蒙板。(此时我的暖色一边在上层。)大体的明暗、中间调便出来了。
6、选一幅合适的国画,经过扭曲变形后叠在上层,应用花瓶外形选区作蒙板。
7、添加一些装饰(可以用失量软件绘制),注意与瓶体之间的关系。
8、给装饰线上色。我准备做成镀金线,因为其质感可与瓷作对比。
9、用渐变绘出金属装饰线的高光,设置如图。注意高光点的位置和大小。
10、用渐变处理瓶口。
11、准备添加高光。
12、准备刻画瓶底。
13、在其上新建一层,因为瓶底较上部暗,使用黑色填充。
14、调整其透明度到合适数值,然后如瓶口般精细刻画。完成后,考虑在瓶体回两条高光,注意位置和形状。
15、最后全面调整,明暗交界线如果不理想,可在蒙板上方便修改;总之要耐心、细致地观察,不对劲的地方适当调整。下面是完成后的效果。
这是没有帖图时的效果:
仿古: