Photoshop 超酷的墙壁材质3D立体字
(编辑:jimmy 日期: 2026/7/6 浏览:2)
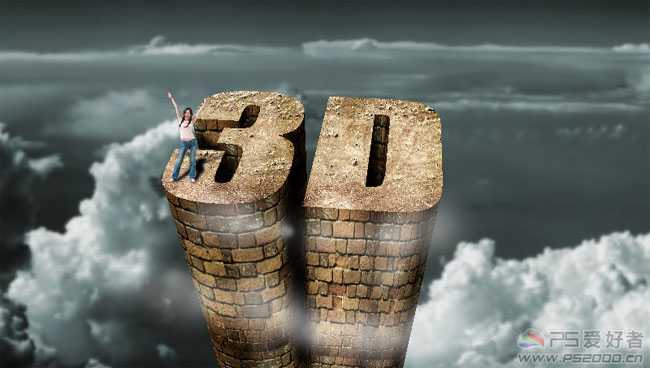
最终效果
<点小图查看大图>
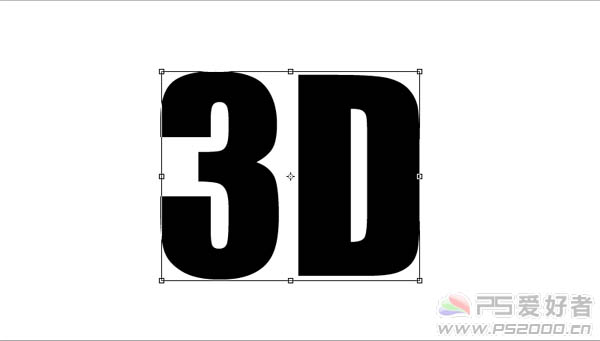
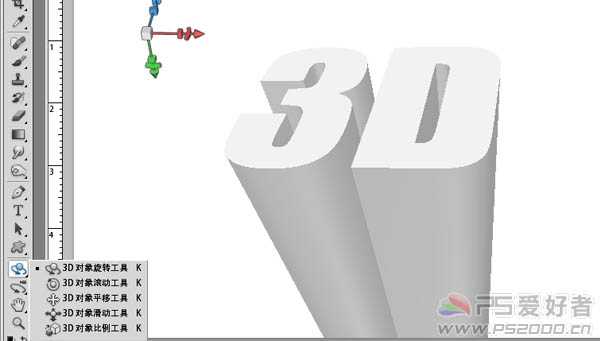
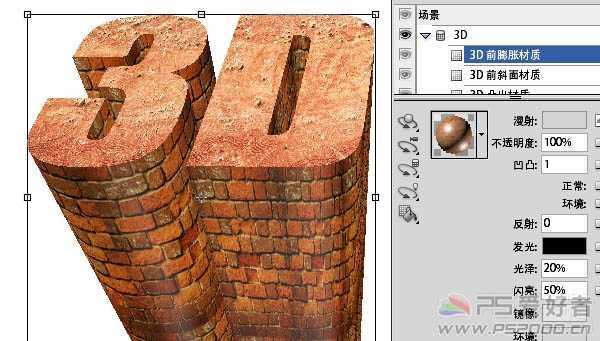
1、新建文档(1024 * 768像素),输入文字。
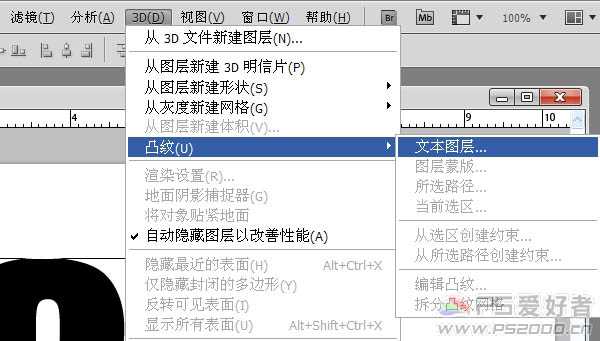
2、3D菜单——凸纹——文本图层(这是CS5版本才有的哦)。
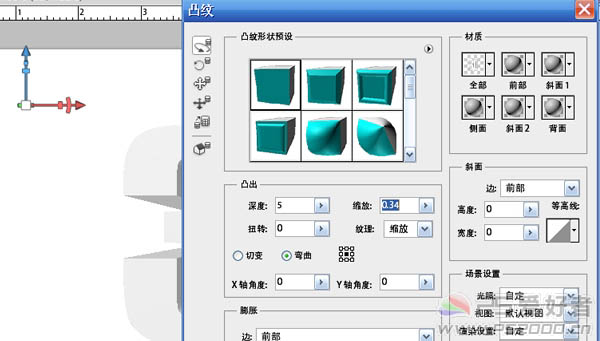
3、选择第一种立体样式,凸出深度5,缩放0.34,材质选择无纹理。其余默认。
4、工具栏选择3D变换工具对生成的3D文字进行移动变换以及旋转,直到满意为止。
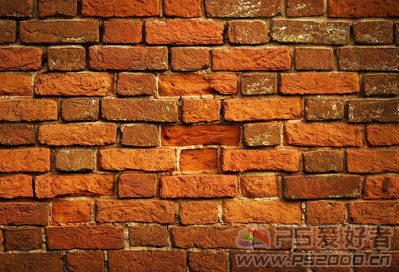
5、菜单栏“窗口——3D”。3D凸出材质中的漫射载入纹理。载入墙壁纹理。
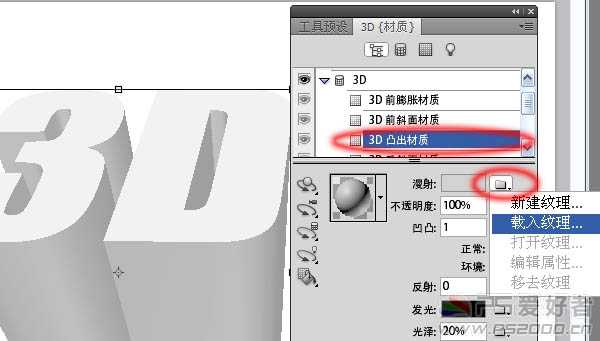
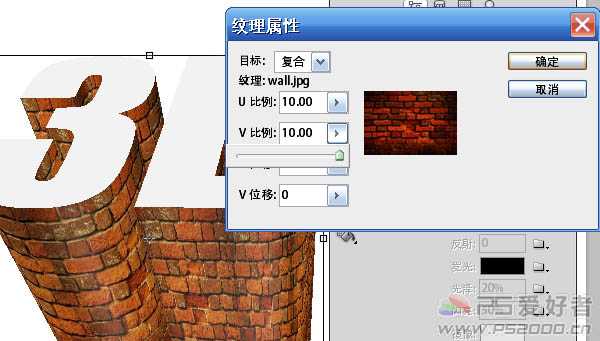
6、纹理感觉太粗了。选择编辑属性。
7、U比例和V比例都设为10.00,现在墙壁看起来好多了。
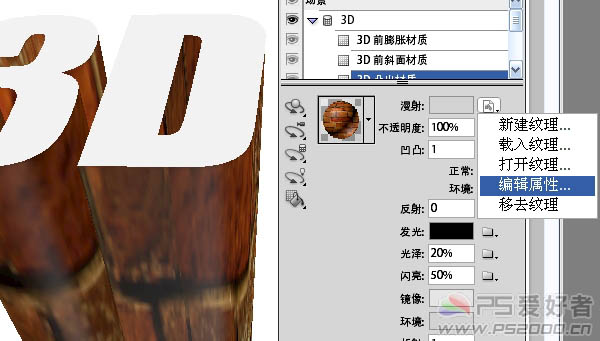
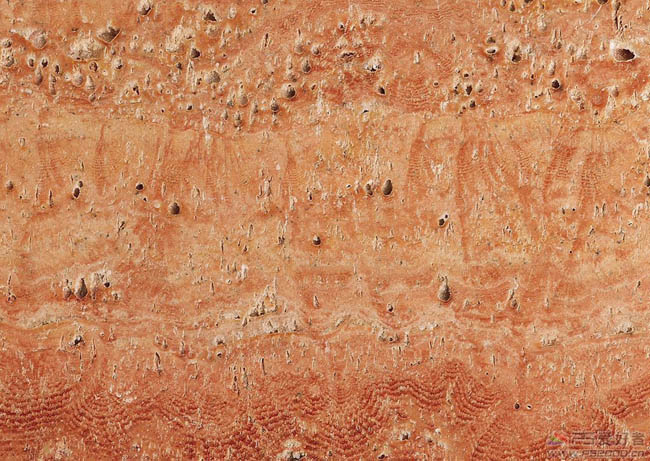
8、3D前膨胀材质同样方法载入石材纹理。
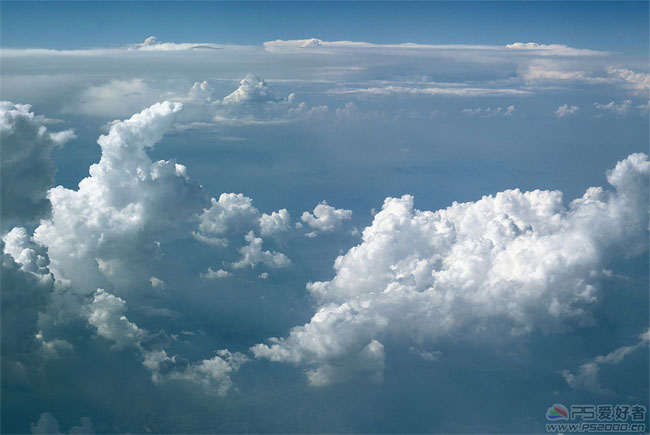
9、打开云彩素材,拖入。ctrl+U调整云彩图层的色相和饱和度。
<点小图查看大图>
上一页12 下一页 阅读全文
<点小图查看大图>
1、新建文档(1024 * 768像素),输入文字。
2、3D菜单——凸纹——文本图层(这是CS5版本才有的哦)。
3、选择第一种立体样式,凸出深度5,缩放0.34,材质选择无纹理。其余默认。
4、工具栏选择3D变换工具对生成的3D文字进行移动变换以及旋转,直到满意为止。
5、菜单栏“窗口——3D”。3D凸出材质中的漫射载入纹理。载入墙壁纹理。
6、纹理感觉太粗了。选择编辑属性。
7、U比例和V比例都设为10.00,现在墙壁看起来好多了。
8、3D前膨胀材质同样方法载入石材纹理。
9、打开云彩素材,拖入。ctrl+U调整云彩图层的色相和饱和度。
<点小图查看大图>
上一页12 下一页 阅读全文
上一篇:ps 金属质感文字效果